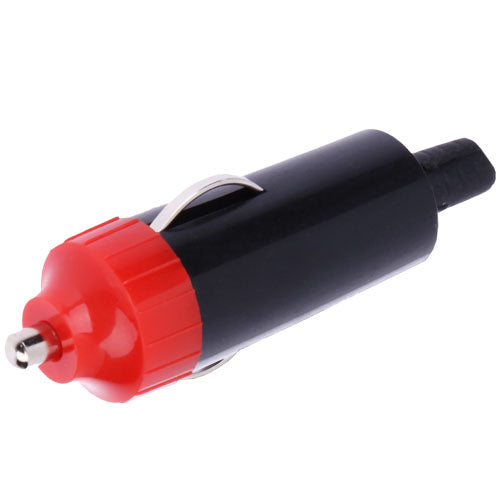
Universal Lighter Plug 12V
Universal Lighter Plug 12V
Couldn't load pickup availability
Quantity: 1
12 Volt Un-Fused
Suitable for in-car use
The 12 Volt Un-Fused Cigarette Lighter Plug is perfect for those who want to charge their devices while driving. This product comes in a convenient and compact design, making it portable and easy to use. It is suitable for use in cars and features short-circuit protection to prevent any damage to your devices.
The universal fitment of this cigarette lighter plug makes it compatible with most cars, and its working voltage of 12V ensures that your devices are charged safely and efficiently. This product is unfused and has a maximum rating of 10A, which is more than enough for most devices.
To install this product, you will need to solder the wires onto the plug. The positive wire should be soldered onto the tip of the plug, while the negative wire should be soldered onto the side spring. Once you have soldered the wires onto the plug, screw the plug back together and insert it into the car's lighter assembly.
Please note that you should remove the lighter insert from the assembly before installing this product. Additionally, it is important to retain any radio codes before disconnecting the battery, as these may be required to operate the radio on reconnection.
Fitting Instructions:
Preparation:
1. Remove lighter insert from assembly.
NOTE: Please retain any radio codes (if applicable) before disconnecting the battery as these may be required to operate the radio on reconnection.
GUIDE TO WIRING:
Bulb Connection
1. Always disconnect battery before working on the vehicle’s electrical circuits.
2. Identify a suitable connection point with the dashboard lighting circuit.
3. Connect the red lead of the bulb holder to the dashboard lighting circuit.
Power Connection
1. Identify a suitable electrical circuit for connection that is protected by a 15-20 amp fuse.
2. Make the 12V positive connection to the centre terminal using the red lead provided.
3. Connect the outer terminal to a suitable earthing point using the black lead provided.
FINAL STEPS:
1. Place the metal assembly including the bulb holder through the hole from the front.
2. Replace lighter insert into assembly.
Share